
7mm scale LNER Full Brakes
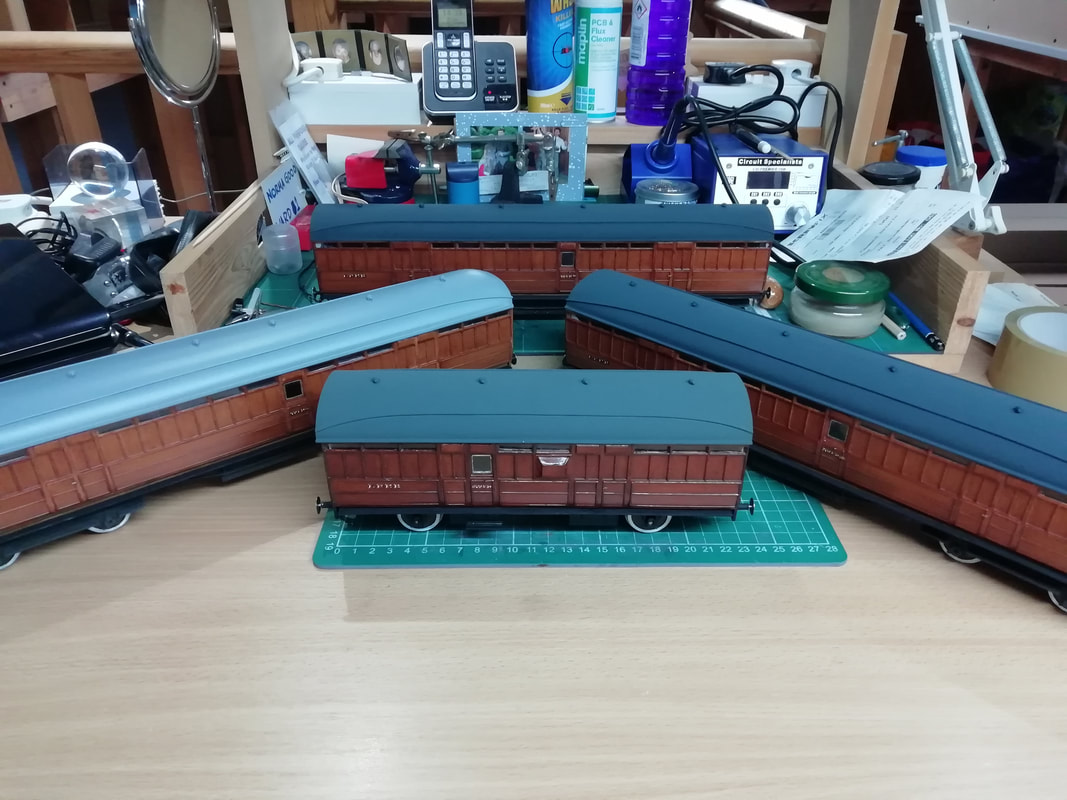
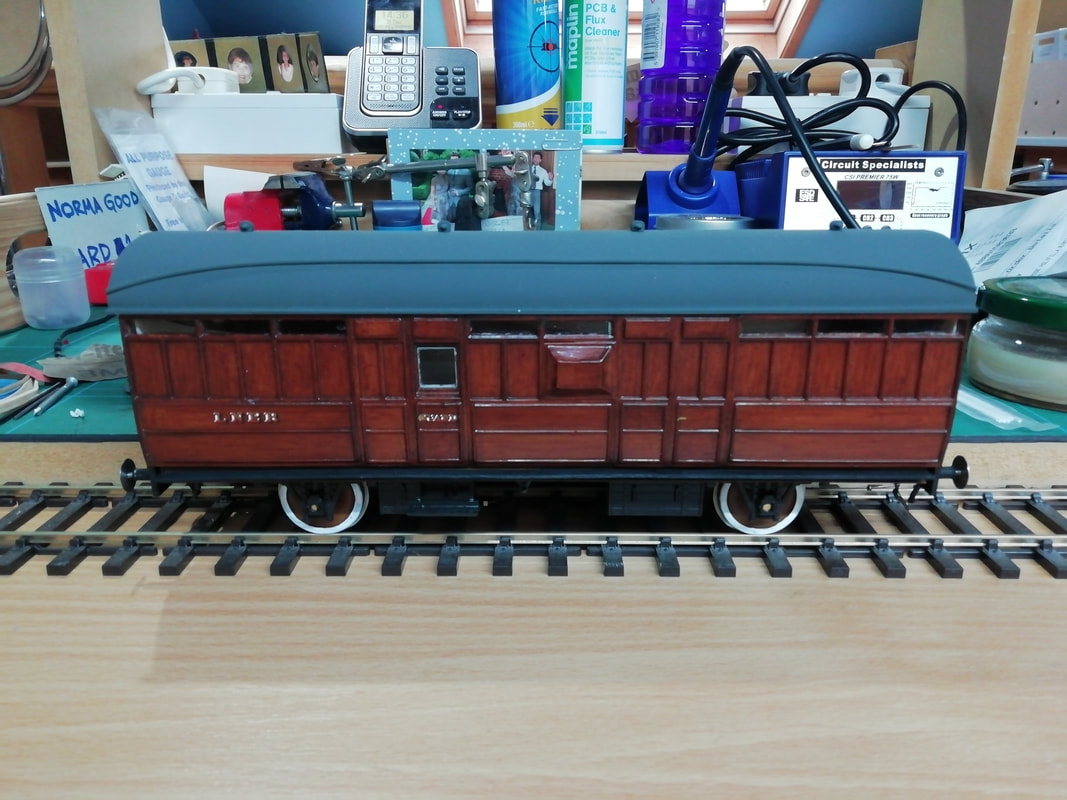
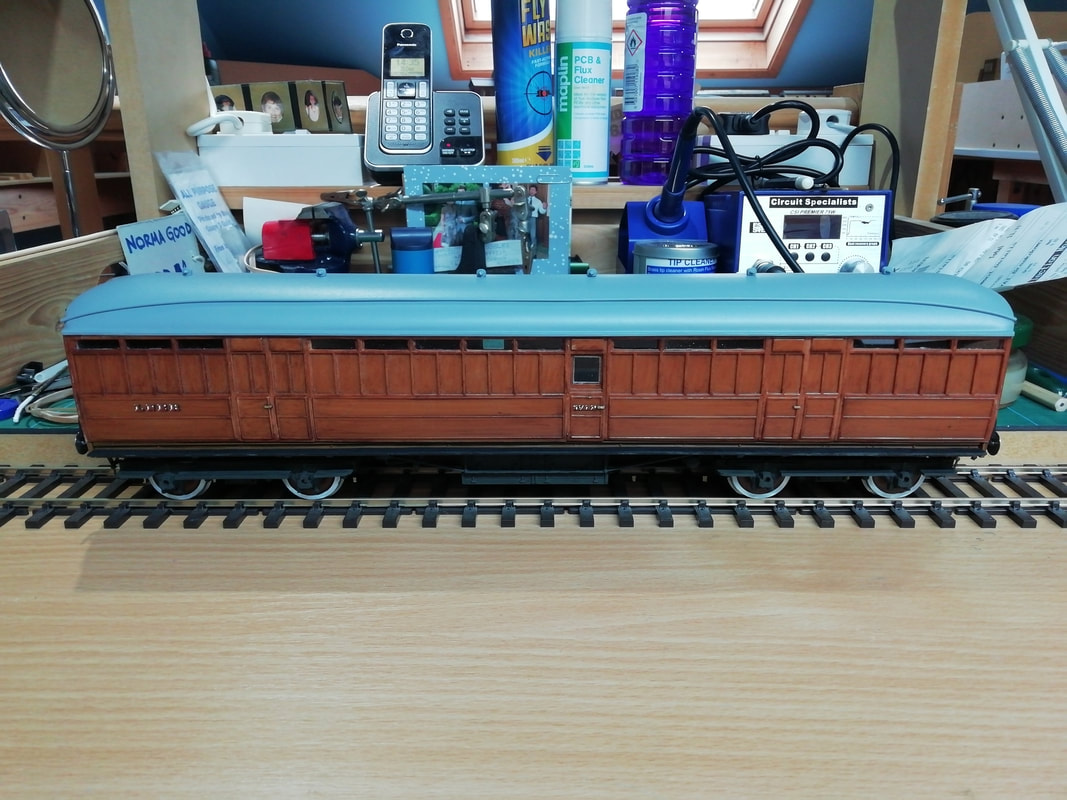
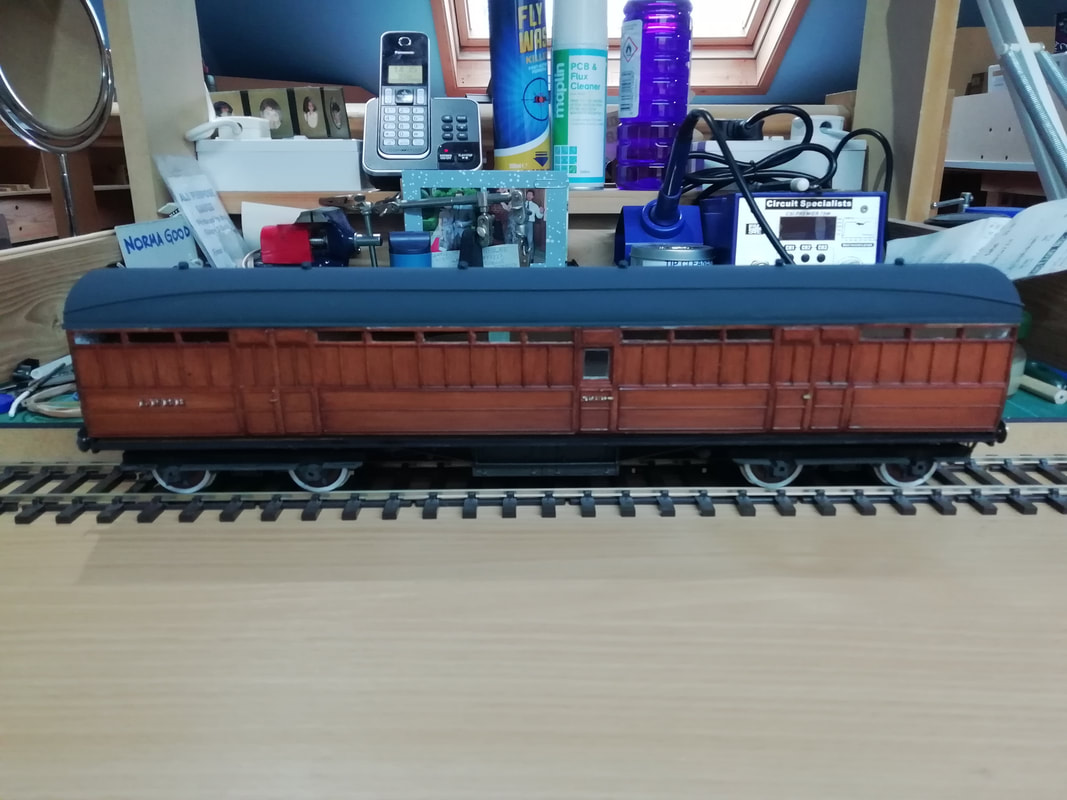
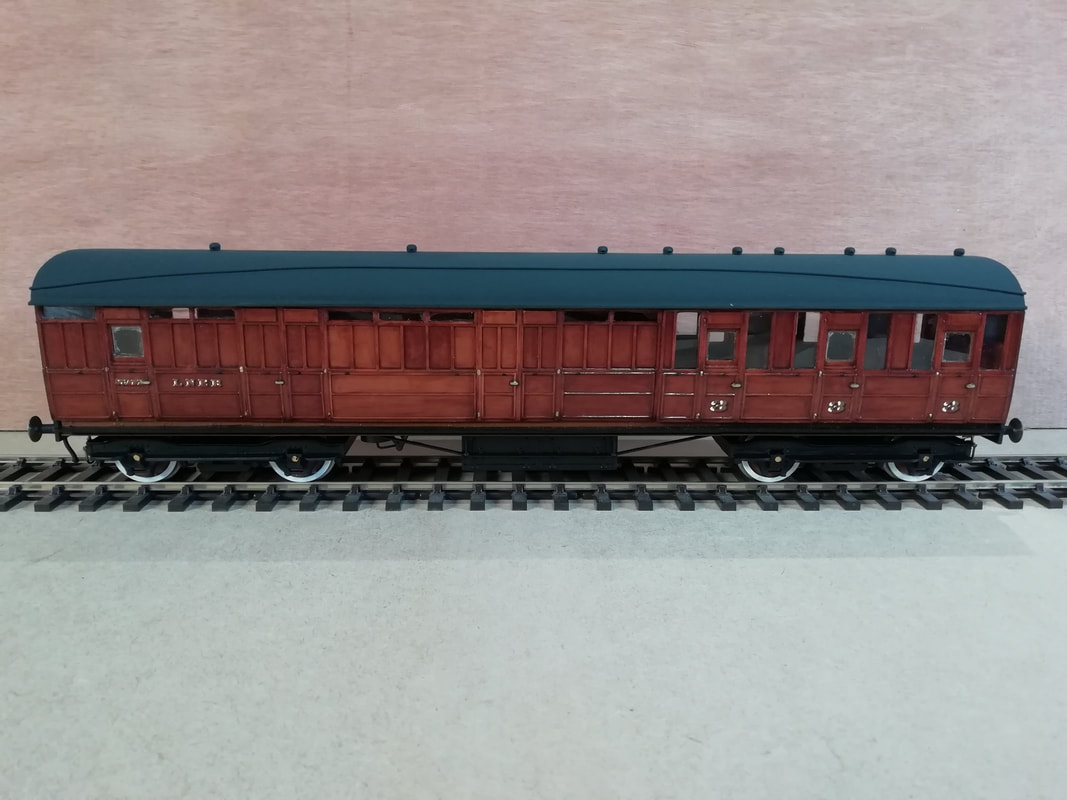
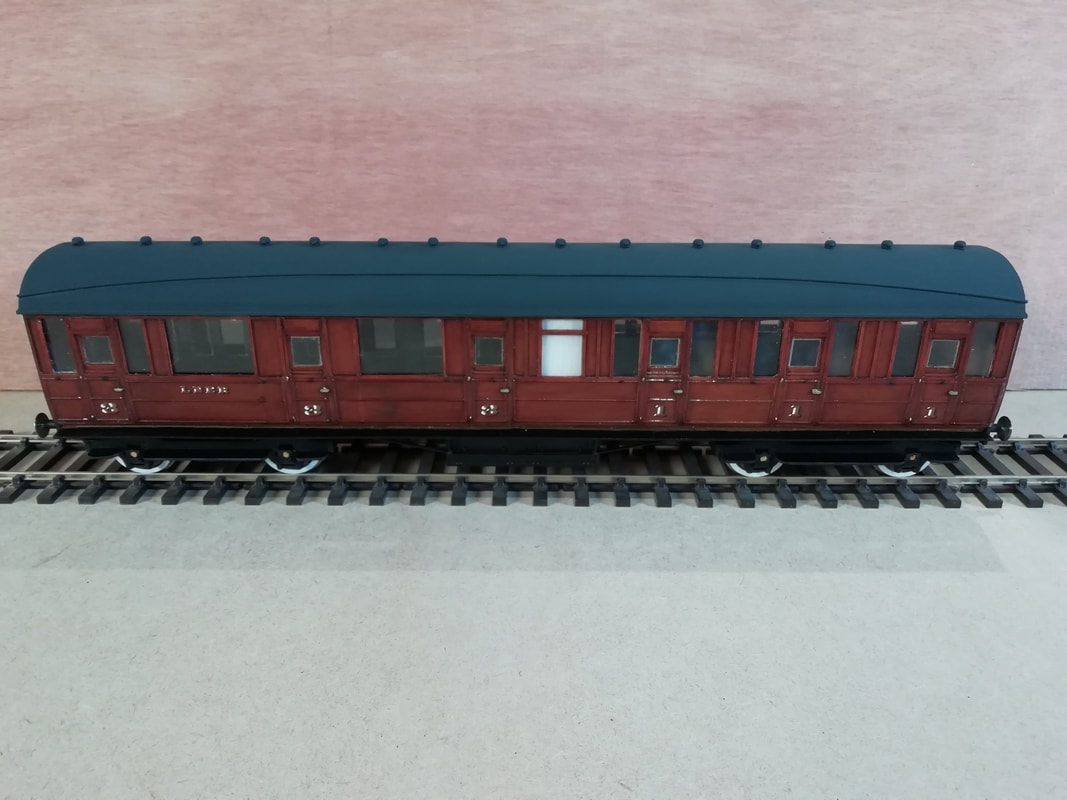
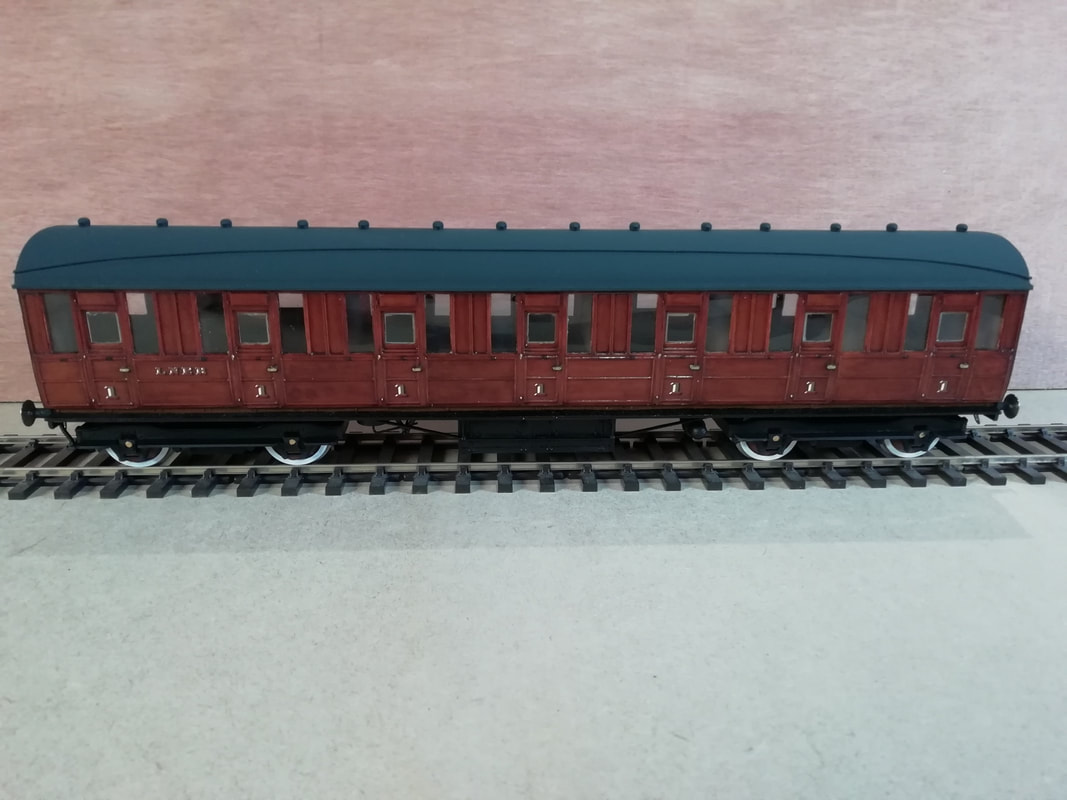
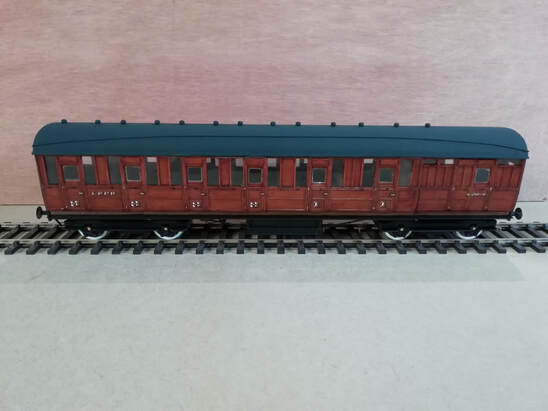
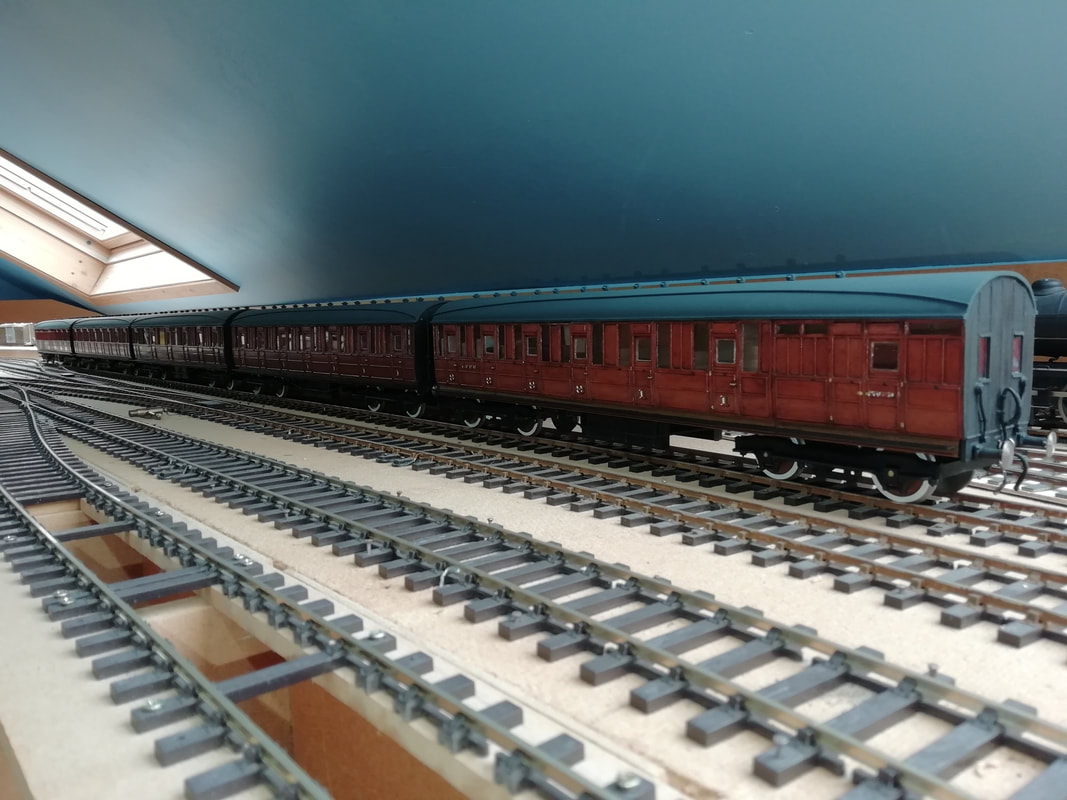
Kits from the 7mm Ian Kirk stable, four full brakes making up a parcel train. It consists of a four wheel, two 51 foot and one 52 foot bow end full brakes.
The method of construction was the same as the previous rake of 51 foot coaches, see below.
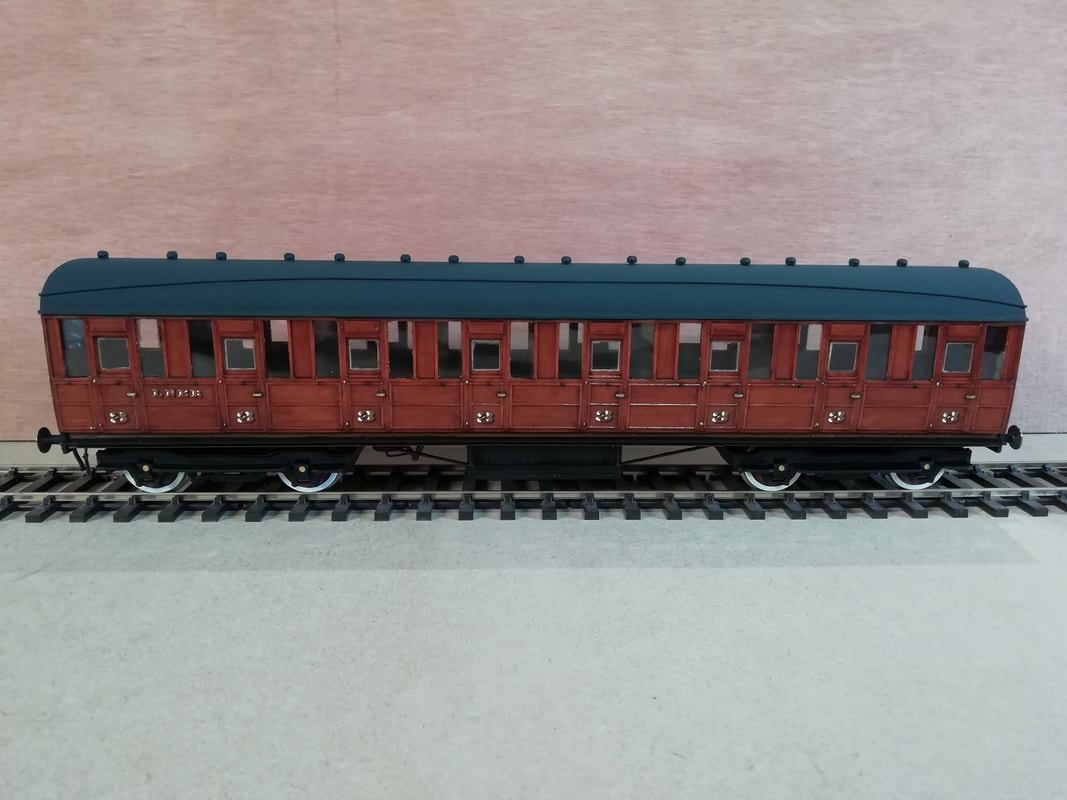
The different depths of teak colour, obtained by the application of more coats of Ronseal satin teak varnish, is more noticeable on this rake.
I also used shades of grey on the roofs in an attempt to depict the different stages of weathering from recently outshopped to years in traffic.
The method of construction was the same as the previous rake of 51 foot coaches, see below.
The different depths of teak colour, obtained by the application of more coats of Ronseal satin teak varnish, is more noticeable on this rake.
I also used shades of grey on the roofs in an attempt to depict the different stages of weathering from recently outshopped to years in traffic.
7mm scale: Slater's LNER/North Easter 20T Hopper Wagons.
Six weeks worth of club nights, cutting parts from sprus, cleaning and dry fitting. Sitting in a warm and friendly environment with like minded people, exchanging ideas, tips and best practice while putting the world to rights.
Then a couple of hours at home during the week sorting out and assembling the bits and pieces.
Gauge 'O' modelling at it's best.
Now, where are those fish vans............
Then a couple of hours at home during the week sorting out and assembling the bits and pieces.
Gauge 'O' modelling at it's best.
Now, where are those fish vans............
|
|
|
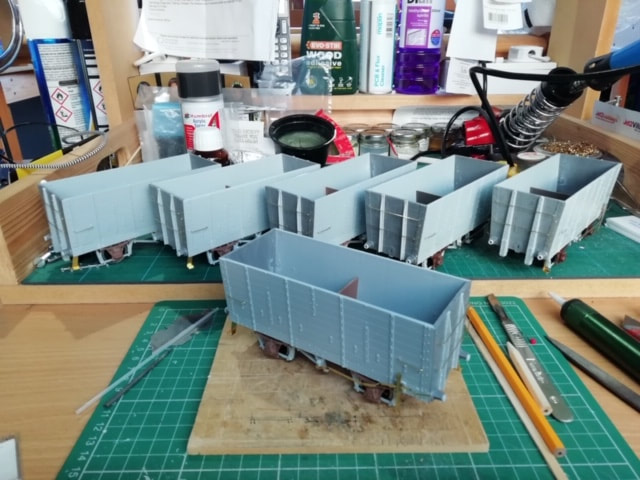
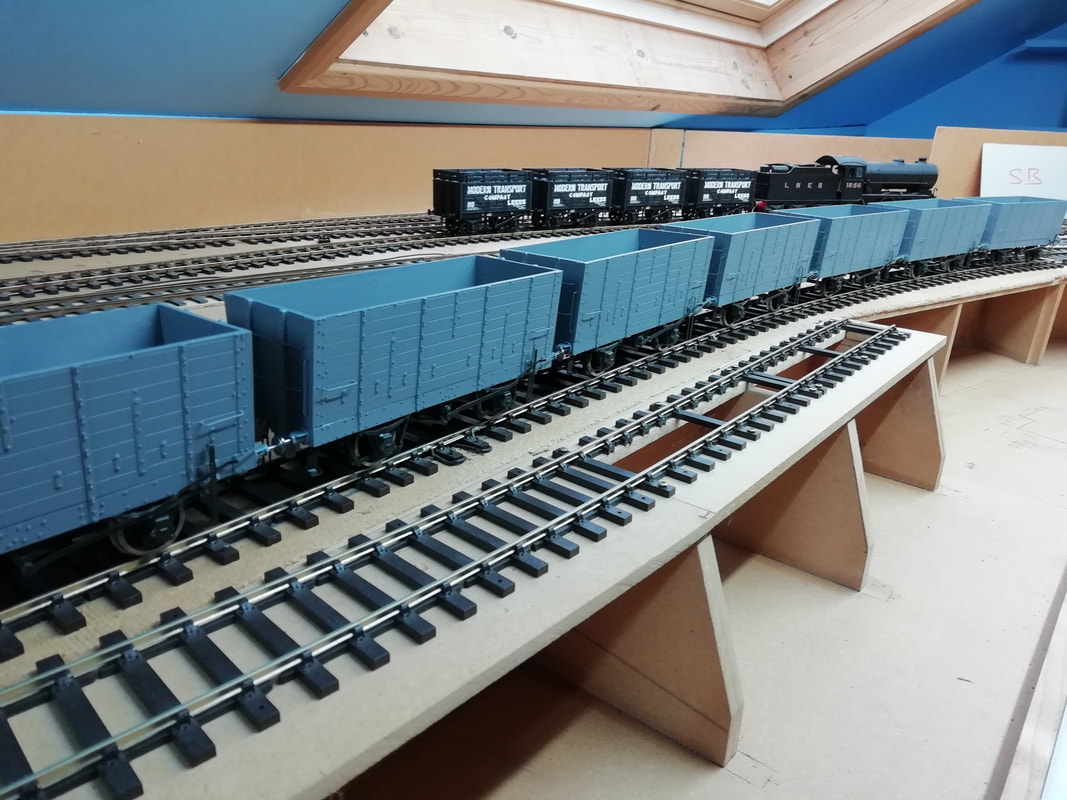
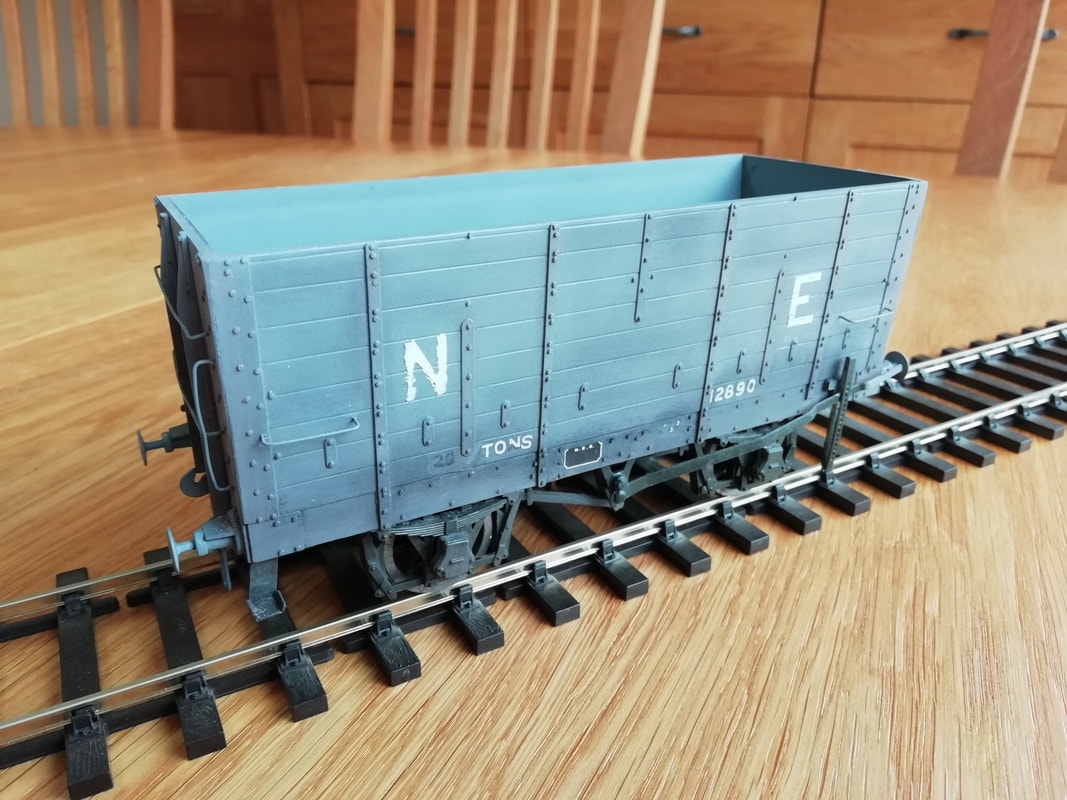
Having sprayed the hoppers, pictured above, it may just be possible to see a slight change in colour from the original mouldings. Research into the shade of grey revealed up to 1911, light grey, then mid grey, until dark grey in LNER days. Helpful?
I have made a selection of the different types that were in production as some did last into LNER days, albeit with repairs, repaint and renumbering.
I started off with the usual Halfords grey primer which I considered to be too light for the LNER period, late 1930s, that I'm trying to depict.
Then I stumbled across a slightly darker grey, according to the can lid at least, primer in Poundland. It is a tad darker but still not the almost charcoal that black and white photo's appear. Having said that, I found an excellent colour image on the LNER Encyclopedia forum of a hopper based at Shildon.
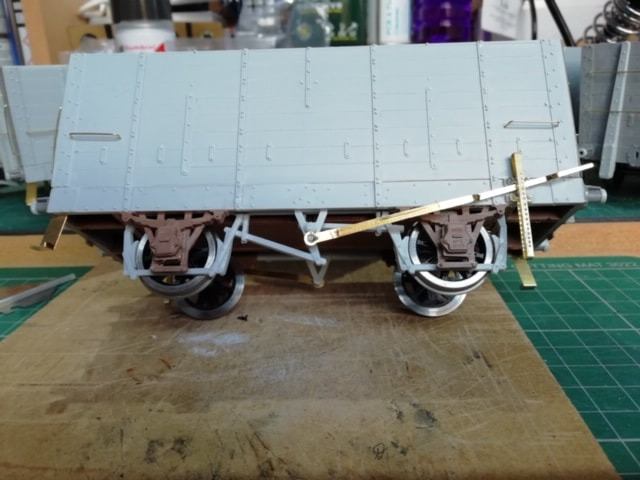
For the underframes, brakes etc, I used Precision P960 Frame dirt (matt) but to my eye, this looked green. I went over it with Precision P978 Track colour (oil leaking) There is still a hint of green to what is now a matt black.
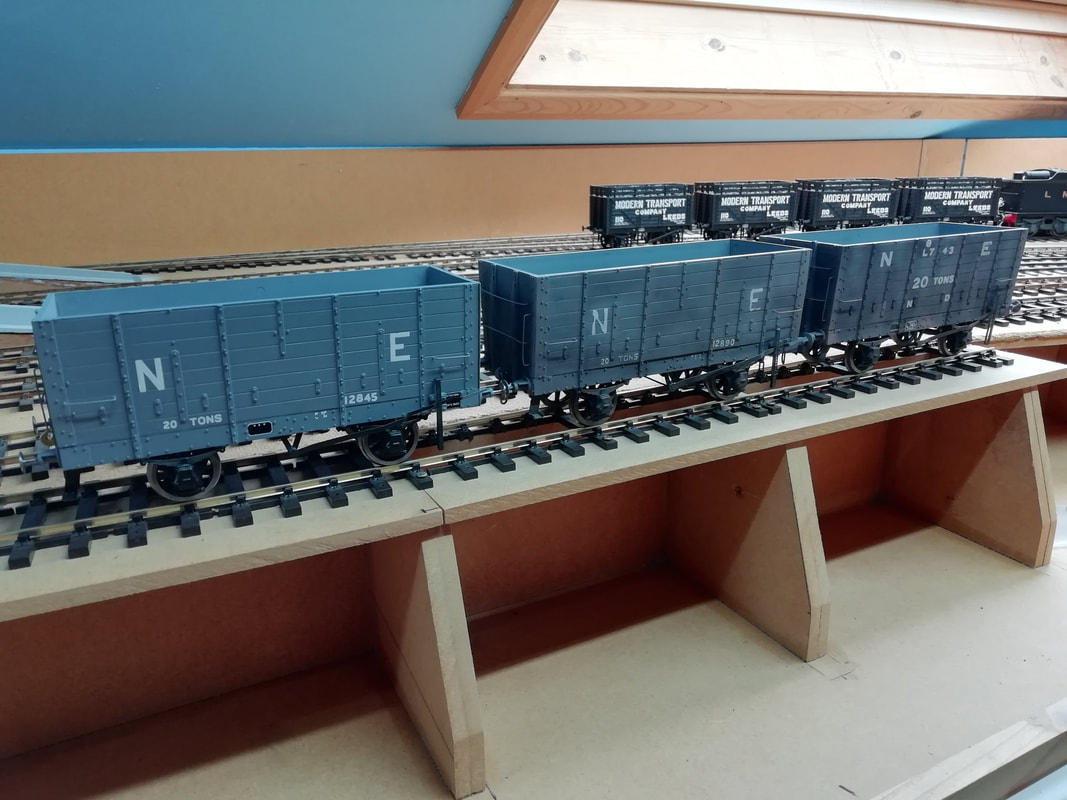
All the lights in my den are white (daylight) led's so it must be my eyes as the image of the rake adjacent to what will be coal drops, look blue!
The next step will be transfers and then some heavy weathering for which I hope to be able to seek advice from a certain club member with quite a reputation for such.
Pitfalls experienced.
Brakes seem to have a habit of stopping the wheels from turning, whether one wants them to or not. In my haste to ensure free running, I centred the axles and then pulled out the bearing caps from the axle boxes and glued them in place. And yes, this of course meant that I was not able to remove the wheels prior to spraying. A lesson learned.
Also, the Poundland primer did not seem to like having the Precision paint over it and required two coats to cover
I have made a selection of the different types that were in production as some did last into LNER days, albeit with repairs, repaint and renumbering.
I started off with the usual Halfords grey primer which I considered to be too light for the LNER period, late 1930s, that I'm trying to depict.
Then I stumbled across a slightly darker grey, according to the can lid at least, primer in Poundland. It is a tad darker but still not the almost charcoal that black and white photo's appear. Having said that, I found an excellent colour image on the LNER Encyclopedia forum of a hopper based at Shildon.
For the underframes, brakes etc, I used Precision P960 Frame dirt (matt) but to my eye, this looked green. I went over it with Precision P978 Track colour (oil leaking) There is still a hint of green to what is now a matt black.
All the lights in my den are white (daylight) led's so it must be my eyes as the image of the rake adjacent to what will be coal drops, look blue!
The next step will be transfers and then some heavy weathering for which I hope to be able to seek advice from a certain club member with quite a reputation for such.
Pitfalls experienced.
Brakes seem to have a habit of stopping the wheels from turning, whether one wants them to or not. In my haste to ensure free running, I centred the axles and then pulled out the bearing caps from the axle boxes and glued them in place. And yes, this of course meant that I was not able to remove the wheels prior to spraying. A lesson learned.
Also, the Poundland primer did not seem to like having the Precision paint over it and required two coats to cover

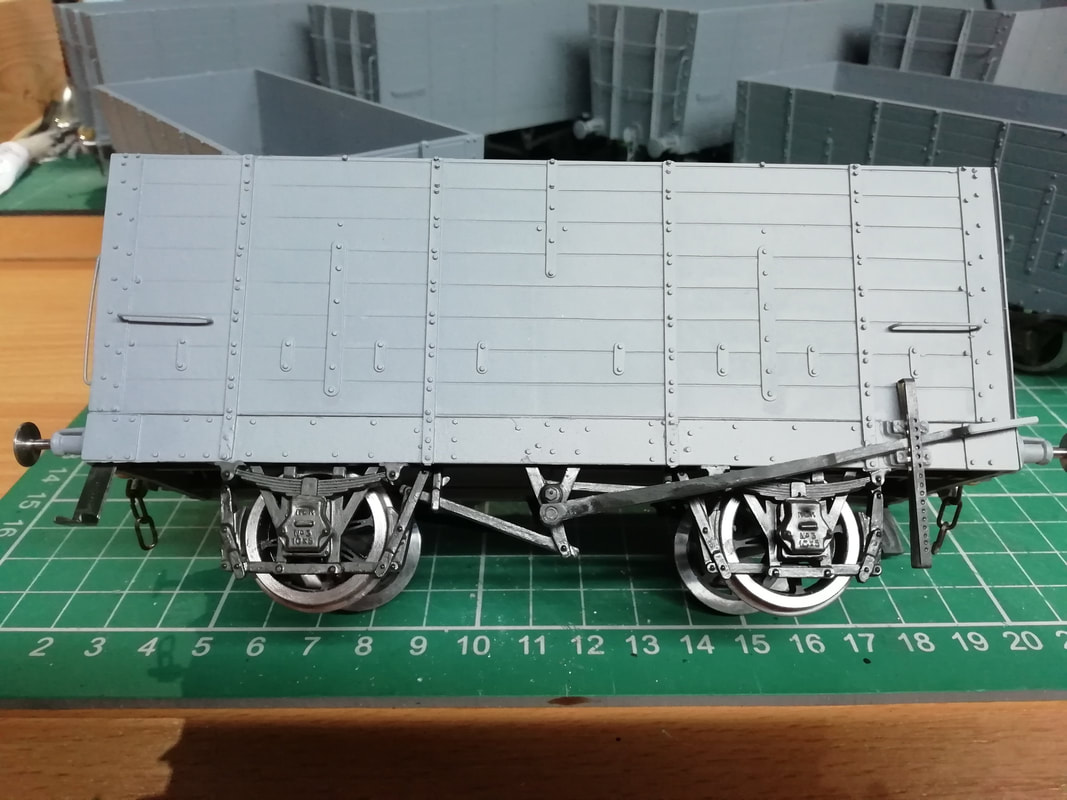
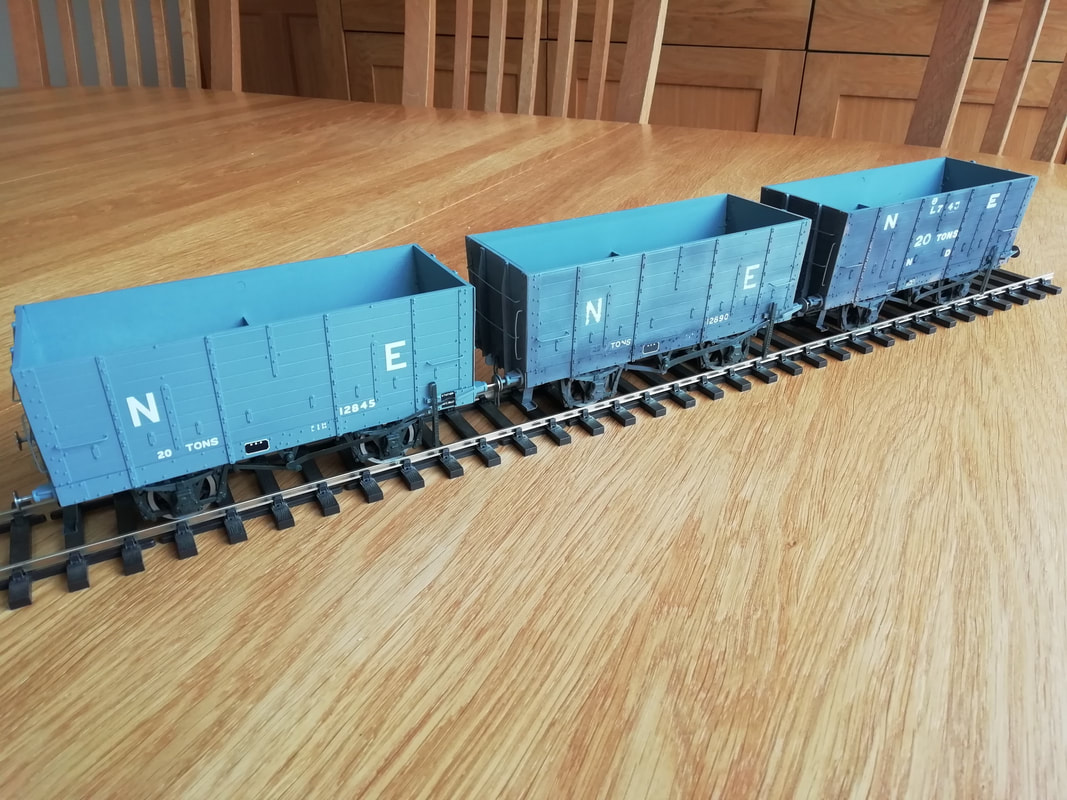
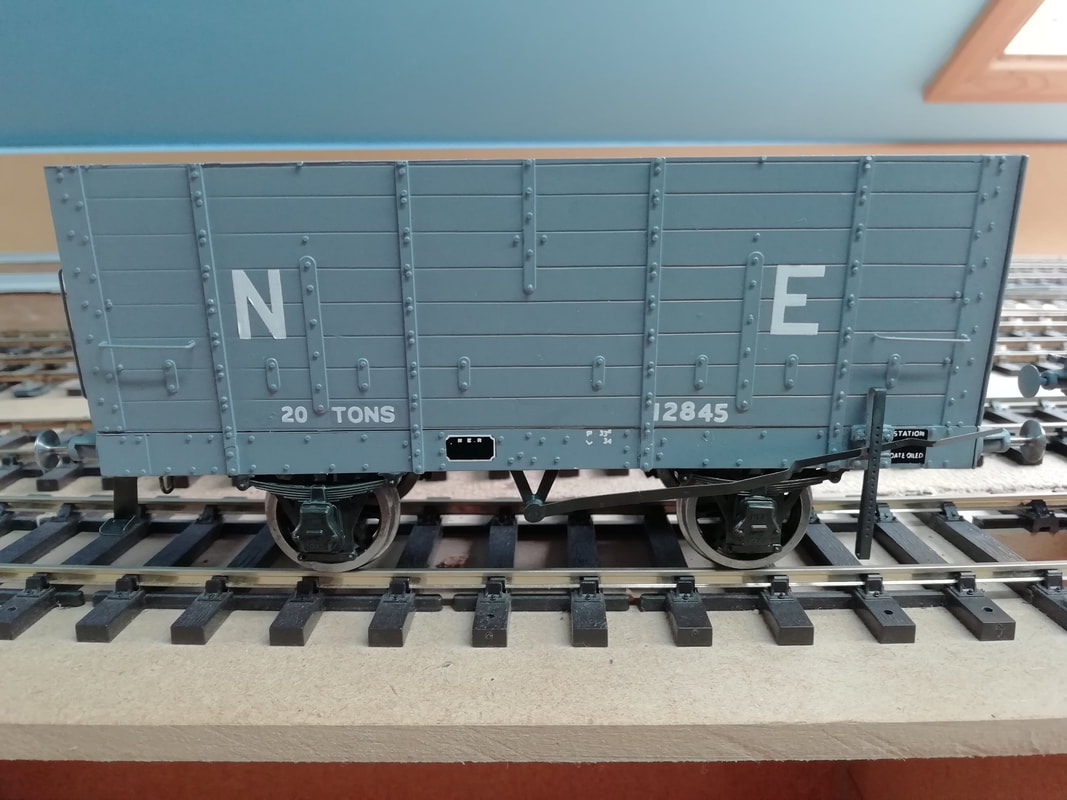
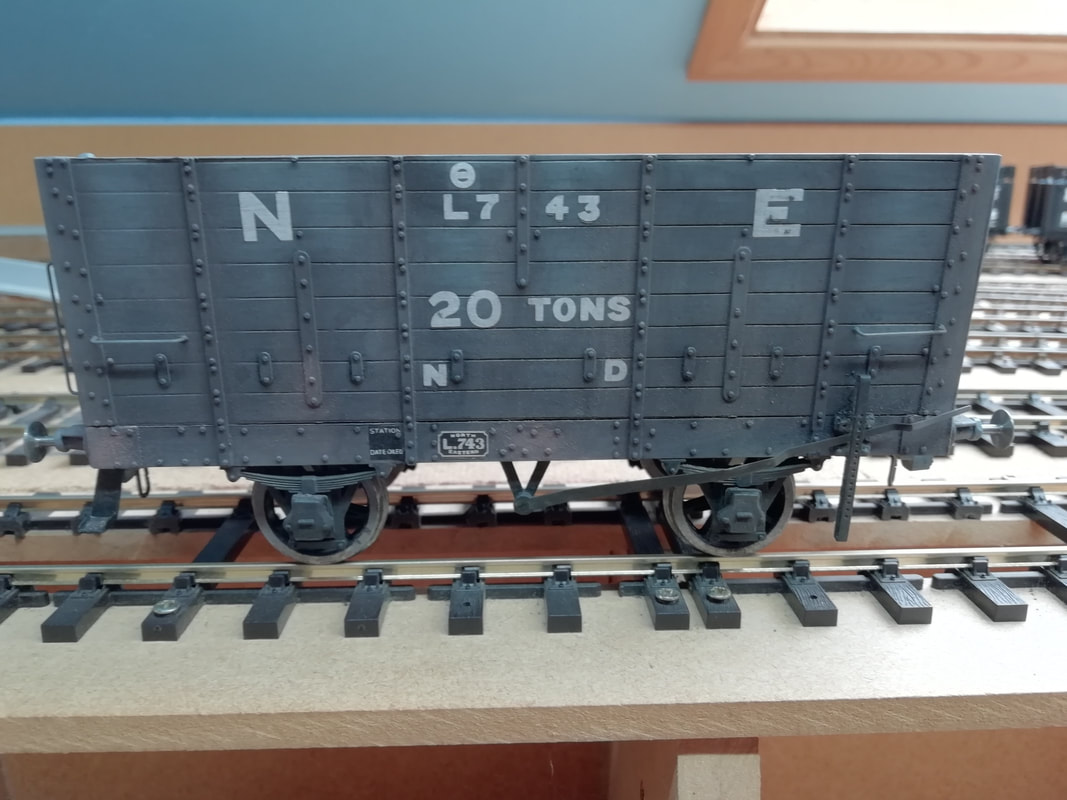
I have now added the transfers supplied with the kits. These are of the type that I believe are called 'methfix'? ie put them in place, apply methylated spirit as a wash, leave for fifteen minutes then soak off the backing sheet with water. That's the theory. I can only assume that as I have been collecting these kits for a number of years, some of the transfers may have exceeded their prime. A bit like the modeller.
Anyway, I found some weathering powders, again purchased many moons ago from 'Carrs' and from 'Eazi Scenic Modelling Products'. With the help of 'YouTube' I set to. It was basically a case of start with the very light grey all over, and then use different shades of grey where appropriate. Orange, for rust staining, was used on the metal work.
I now need to aquire a suitable acrylic clear matt varnish to fix and protect the transfers and powder.
I'm pleased with the result so far and like to think that the images, due to the lighting in my den or my camera, don't do the wagons justice.
|
|
A five coach rake of LNER 51 ft 11/2 inch Teak Suburbans built from 7mm Ian Kirk kits.

The coaches are as follows:-
|
Brake 3 compartment 3rd
|
8 compartment 3rd
|
|
Semi corridor 2 compartment 1st / 3 compartment 3rd lavatory composite
|
7 compartment 1st
|
Brake 2 compartment 1st / 4 compartment 3rd composite
The kits come, like most, as a bag of bits.
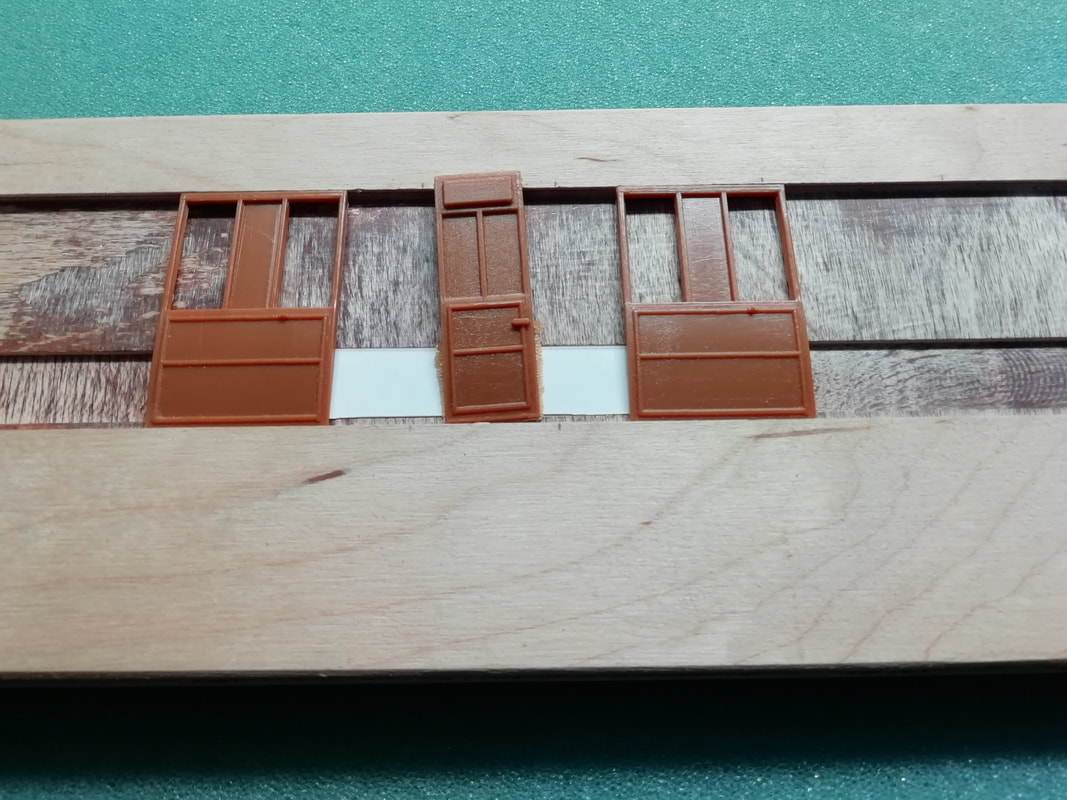
Each coach side panel, window and door are individually moulded so all that is required is to clean off the flash and glue them together, in the appropriate order for the particular coach, onto a strip of plasticard. The plasticard strip is positioned to strengthen the coach sides and form a lip into which the floor locates.
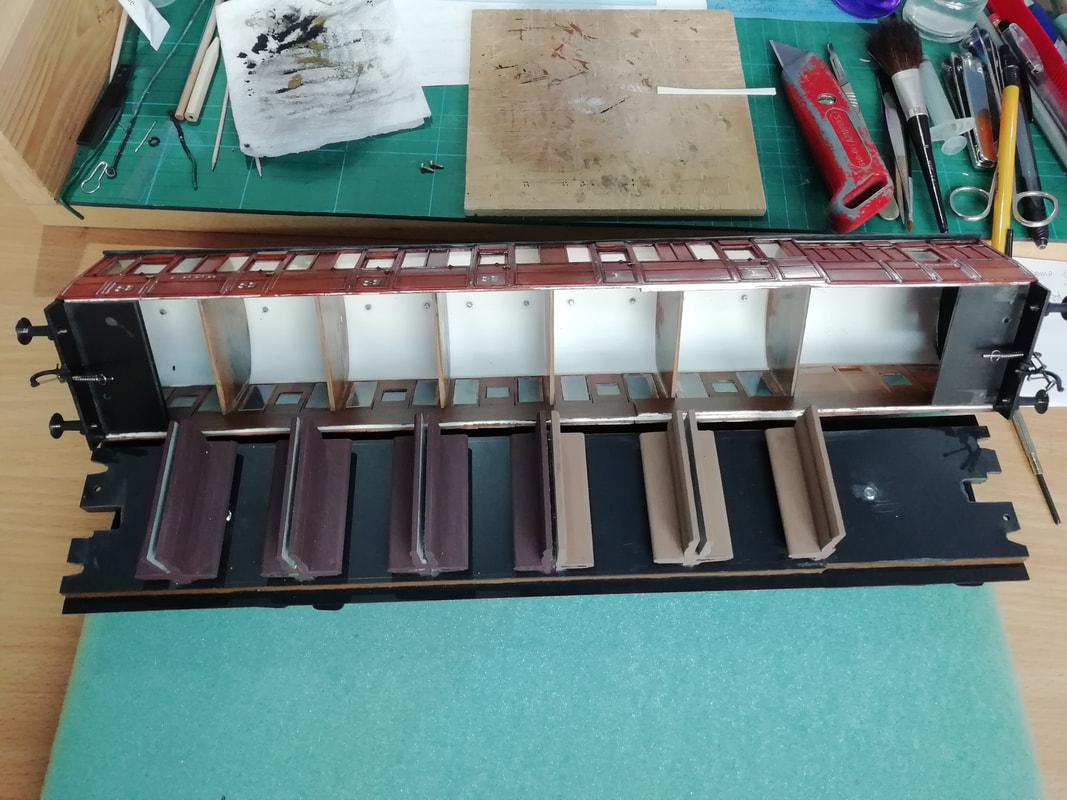
The secret is to ensure that the plasticard strip is in the correct position and the panels are kept square. To ensure both, I have a jig made from 11mm thick 9 ply routed to the appropriate depths. See the two images attached.
Each coach side panel, window and door are individually moulded so all that is required is to clean off the flash and glue them together, in the appropriate order for the particular coach, onto a strip of plasticard. The plasticard strip is positioned to strengthen the coach sides and form a lip into which the floor locates.
The secret is to ensure that the plasticard strip is in the correct position and the panels are kept square. To ensure both, I have a jig made from 11mm thick 9 ply routed to the appropriate depths. See the two images attached.

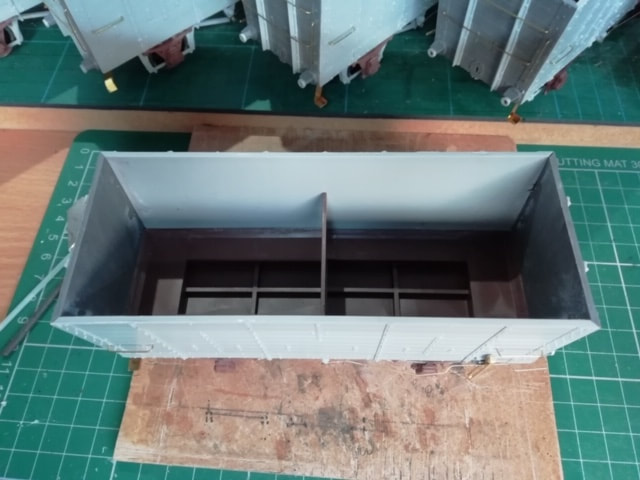
Members of the Gauge O Guild may have noticed in the Gazette that over the years contributors have detailed ways of joining the floor and roof to the assembled sides. I chose to fix the roof and the compartment partitions to the coach sides. This I think gives a better fit at the roof line and more strength to the coach. An additional piece of plasticard is fixed across the coach at either end to screw the floor to. The seats are fixed to the floor and fingers are crossed in the hope that the partitions will fit down the back of the seats. See image.
The semi corridor lavatory composite was the one coach that gave me problems. The coach sides were about 5mm ie close on 1ft, shorter than the other four. This I believe is because all of the compartment components are for 3rd whereas the two 1st should be slightly longer. Not an issue until lining up the lavatory windows across the coach and it becomes obvious that the corridor end of the coach side is out. This really is an example of something being short but only at one end.
To overcome this I fabricated a couple of larger panels for the coach sides and made two new 1st compartments.
To overcome this I fabricated a couple of larger panels for the coach sides and made two new 1st compartments.
There are many ways to achieve the teak effect finish. Most require a sub base of yellow, orange, ochre, brown and any combination of the above before coats of clear varnish. Because the kits are made from an orange / brown plastic, I just hand brushed Ronseal satin teak interior varnish straight onto the plastic. I use a reasonably stiff flat brush and stroke in the direction of the wood grain. By not being to finicky, or even careful, shading across each panel can be achieved. The older the coach, the darker the teak. This is achieved by applying more coats of varnish.
I would recommend Kirk kits in conjunction with Historic Carriage Drawings Volume One.
The results I think are pleasing, especially as I only started them just before Christmas...... 2016.
The results I think are pleasing, especially as I only started them just before Christmas...... 2016.